Fun with Resin!
Resin Crafts are a lot of fun! They give you the ability to create fun and interesting pieces that reflect your personality.
Working with resin requires some patience and accuracy to get the best results.
The videos and resources in this page will help you get the most fun out of your Purple Ladybug's Resin Crafts Kits.
Product Overview
Learn about the various Resin Crafts Kits available from Purple Ladybug.
This kit will let you create a large unicorn horn that's perfect for decor and holding hair elastics.
A stylish and fun headband kit. Show off your Unicorn creation with your favourite hair style.
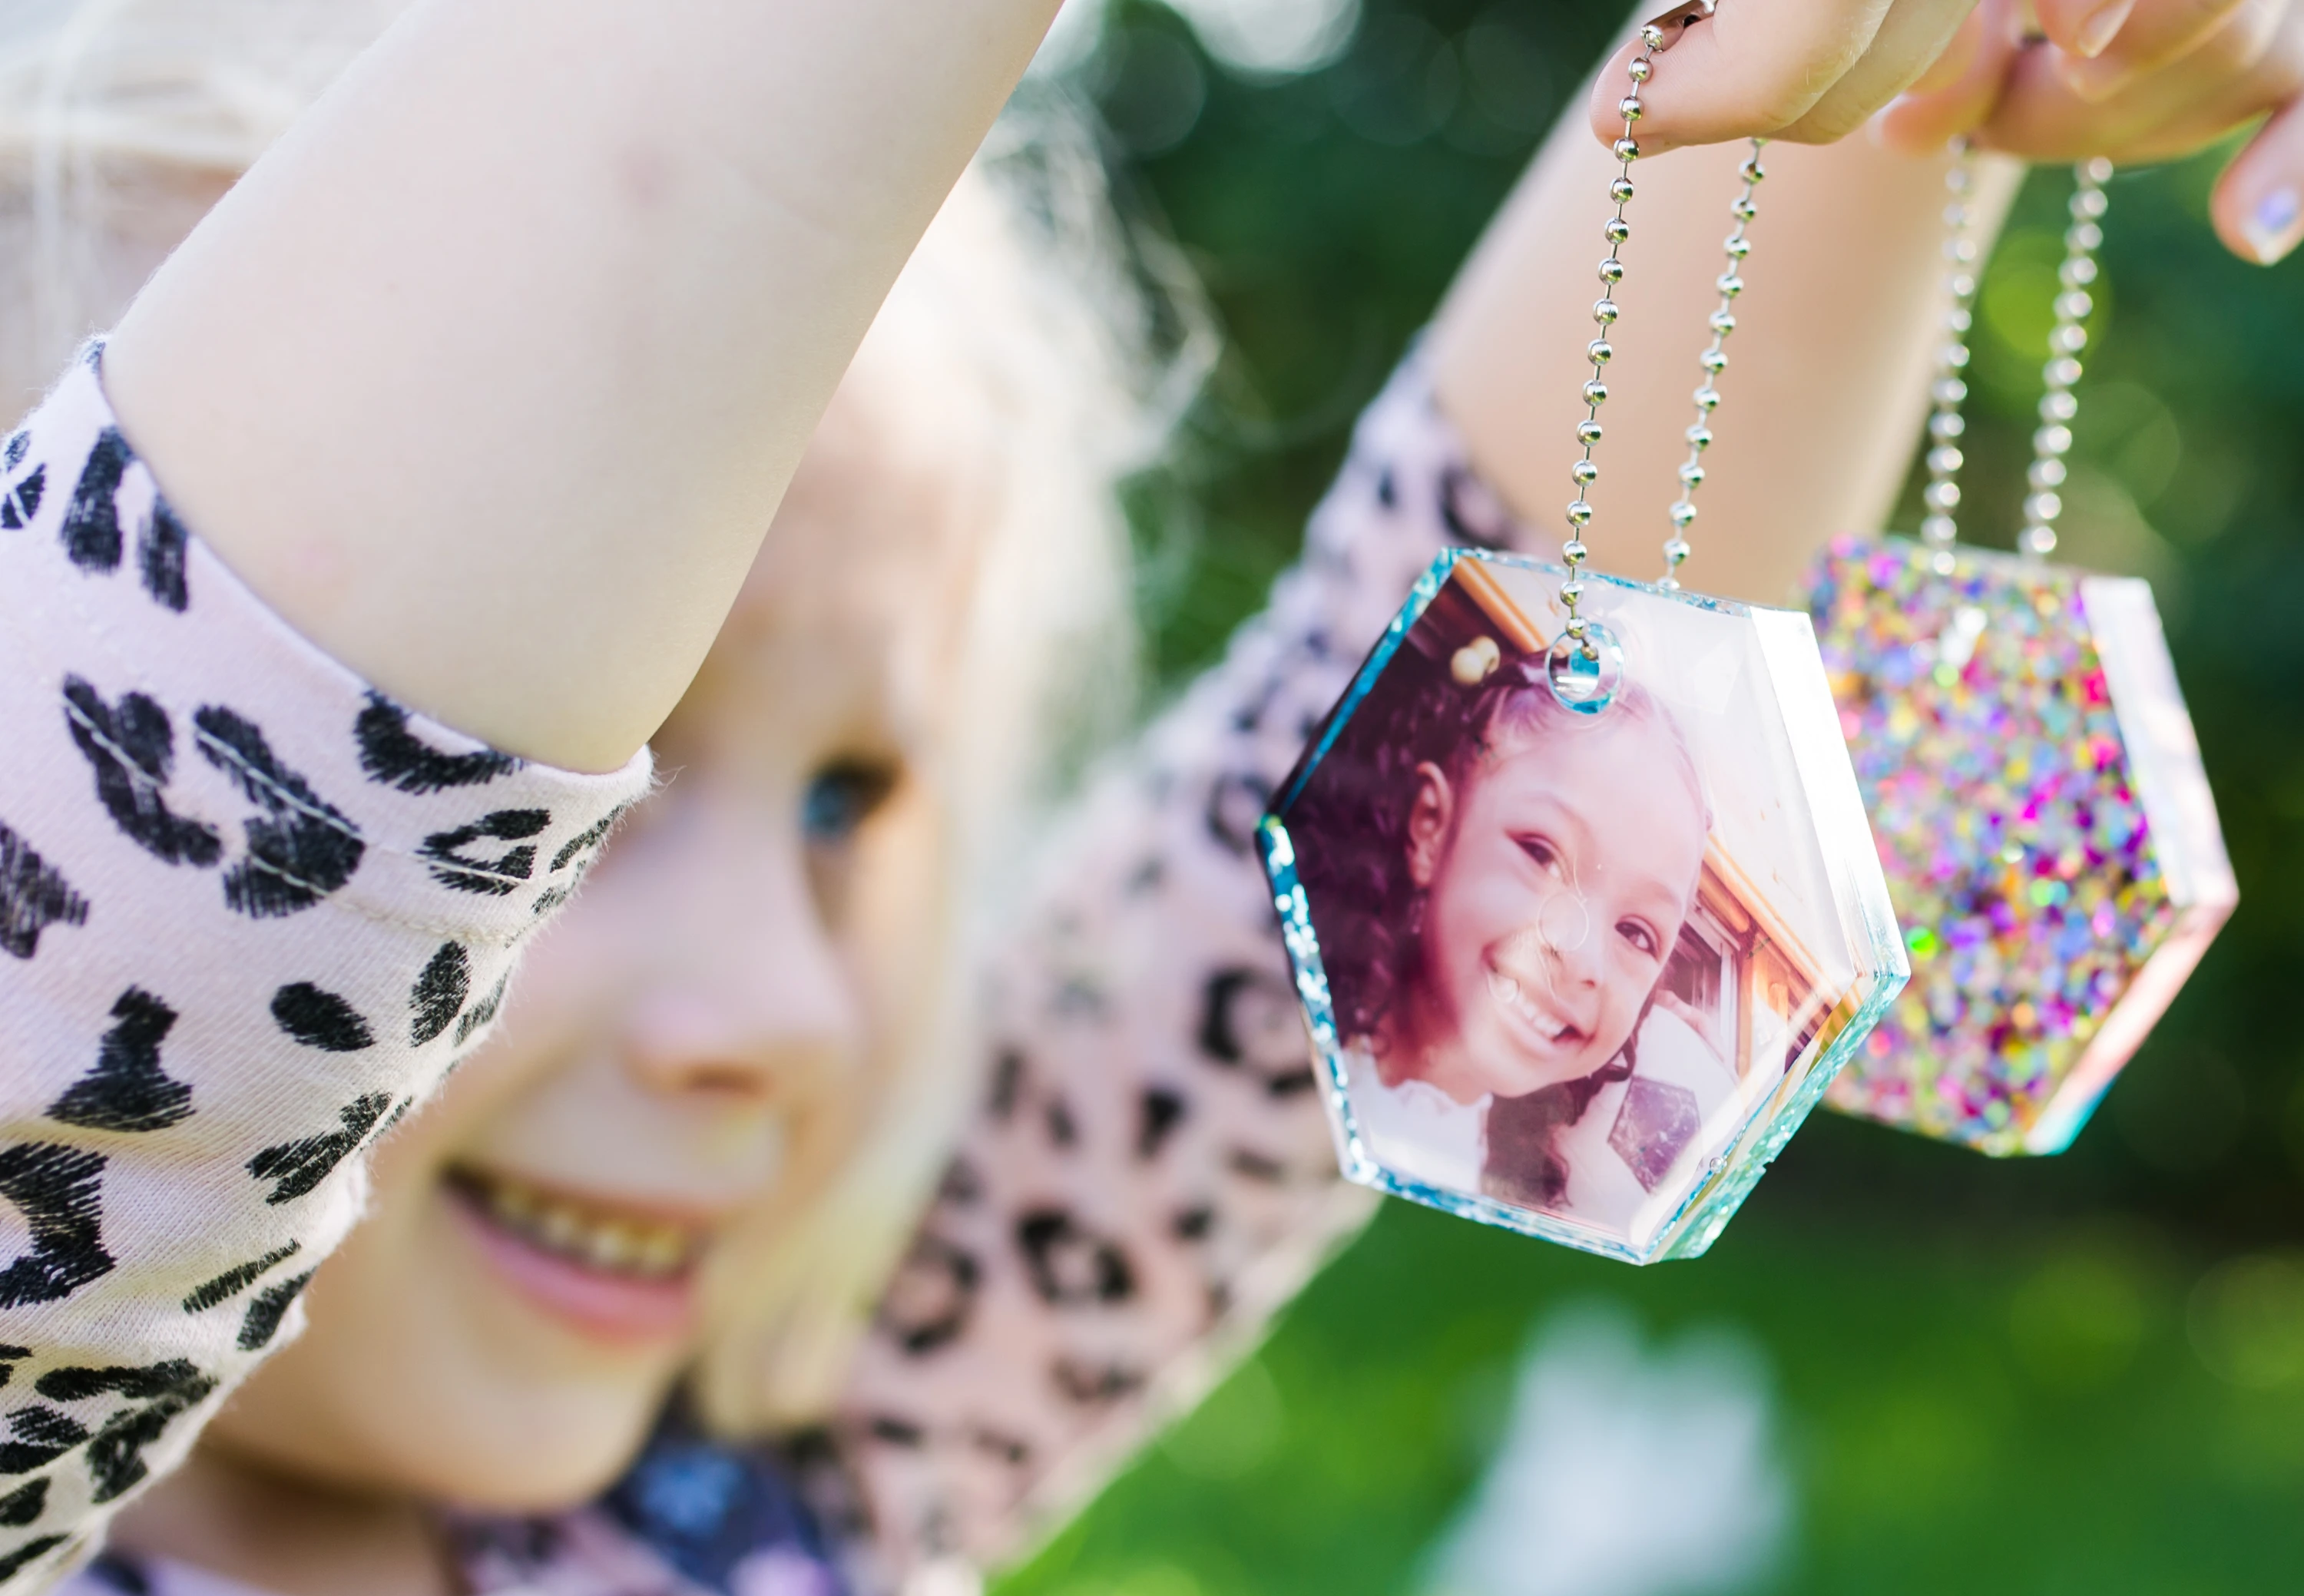
What a wonderful way to create a memory charm with a photo in it.
Perfect for hanging on backpacks, keychains and so much more!
Tutorial Videos
Check back on this page often, as more videos are added regularly.
Quick Overview of the Resin Craft Process
This is a quick overview video of the entire process of creating your Resin Craft.
Setting Up Your Workspace
One of the most important steps is setting up your workspace so that you can work efficiently and minimize the potential for a sticky mess.
Laying out the contents of your kit and planning will guide you to a successful resin craft experience.
Releasing Your Craft From The Mold
Once your resin craft has had time to set, it is time to release it from its mold.
This is a fairly simple process, but here are some pointers and tricks to make it easier.
Headband Kit - How much resin do you need for each layer?
In this video, we show you how far each pour can get you on the horn mold given a specific amount of resin mix.
Since the horn is a cone shape, the amount of resin needed for each layer can vary.
Headband Kit - First Pour
With an organized workspace and a plan, you're now ready to start mixing resin and pouring into the mold. Exciting!
Follow the instructions in your kit, and this video tips to get the best results.
You can keep repeating these steps for additional pours until your craft is complete. Just make sure to wait at least 2-3 hours between pours to give the resin enough time to set.
Headband Kit - Setup and First Pour
Another view point of the first pour for the Headband Kit.
With an organized workspace and a plan, you're now ready to start mixing resin and pouring into the mold. Exciting!
Follow the instructions in your kit, and this video tips to get the best results.
You can keep repeating these steps for additional pours until your craft is complete. Just make sure to wait at least 2-3 hours between pours to give the resin enough time to set.
Headband Kit - Attaching your Unicorn Horn to the Headband
This video applies to the Unicorn Headband Kit.
When you finish your unicorn horn for your headband, here's how to release it from the mold, and attach it to the headband.
Headband Kit - Attaching your Unicorn Horn to the Headband
Another view of attaching the horn to the headband
This video applies to the Unicorn Headband Kit.
When you finish your unicorn horn for your headband, here's how to release it from the mold, and attach it to the headband.
Photo Charms Kit - Setup and First Pour
This video applies to the Photo Charms Kit.
In this video we show you how to setup and do the first pour for your Resin Craft Photo Charm kits
Photo Charms Kit - Preparing the photo for the charm
This video applies to the Photo Charms Kit.
In this video we show you how to prepare your photo to use in your photo charms.
We don't recommend using magazine or newsprint cutouts as the colors will run.
We recommend only using photographs.
Large Horn Kit - Setup and First Pour
This video applies to the Large Horn Craft Kit.
This video shows how to setup and do the first pour for the large Unicorn Horn Resin Craft Kit.
Large Horn Kit - How Much Resin do you need?
This video applies to the Large Horn Craft Kit.
This video shows how much resin you need to create layers in the Unicorn Horn Resin Craft Kit.
Because the horn is a cone, you'll need different amounts of resin to achieve similar height layers.
Large Horn Kit - Removing your craft from the mold
This video applies to the Large Horn Craft Kit.
We show you how to remove your finished Unicorn Horn from its mold.
Large Horn Kit - Filing down the edges.
This video applies to the Large Horn Craft Kit, but can also apply to any of our other resin craft kits.
In this video we show you how to file down any sharp edges on your resin craft creations.